域名服务器端
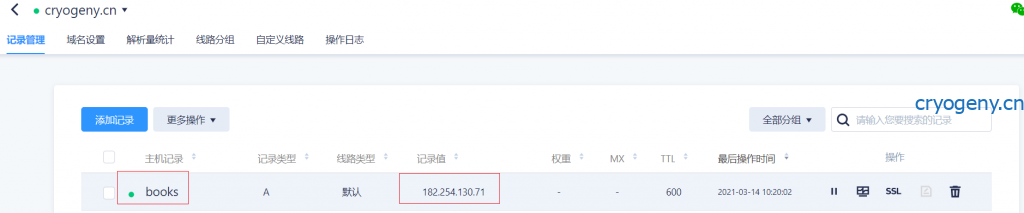
添加域名
设置反向代理
如下图增加红框中内容,同时删除默认的两段的location/{} ,最后的配置文件的末尾如代码段内所示
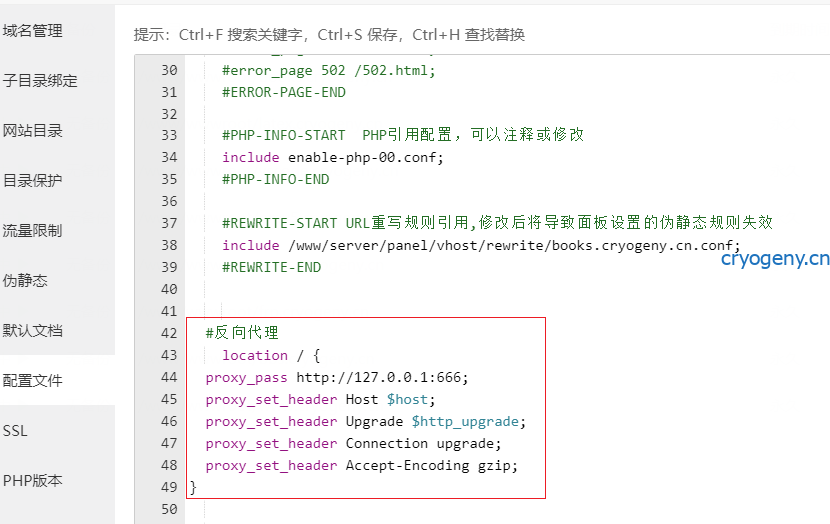
#反向代理
location / {
proxy_pass http://127.0.0.1:666;
proxy_set_header Host  http_upgrade;
proxy_set_header Connection upgrade;
proxy_set_header Accept-Encoding gzip;
}
http_upgrade;
proxy_set_header Connection upgrade;
proxy_set_header Accept-Encoding gzip;
}
#禁止访问的文件或目录 location ~ ^/(\.user.ini|\.htaccess|\.git|\.svn|\.project|LICENSE|README.md) { return 404; }
#一键申请SSL证书验证目录相关设置 location ~ \.well-known{ allow all; }
access_log /www/wwwlogs/books.cryogeny.cn.log;
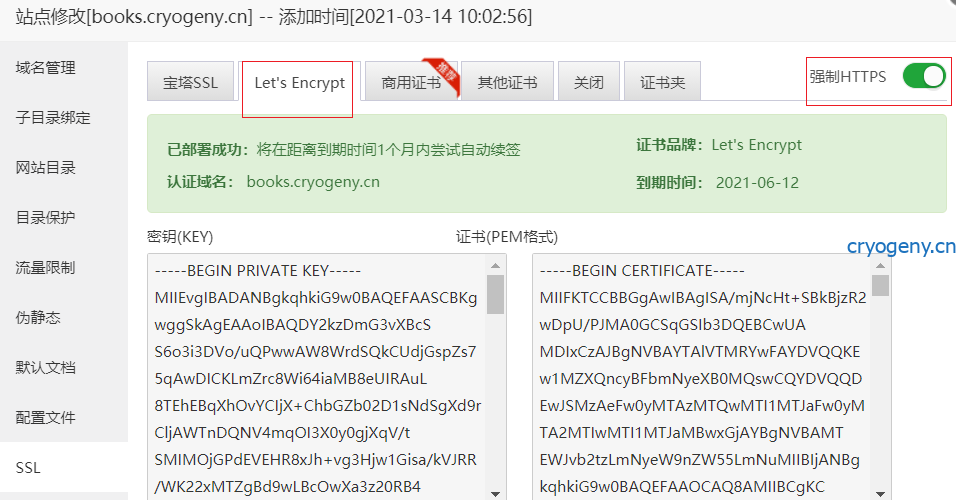
error_log /www/wwwlogs/books.cryogeny.cn.error.log;同时如下图申请好ssl,再打开强制https
nas端
配置客户端
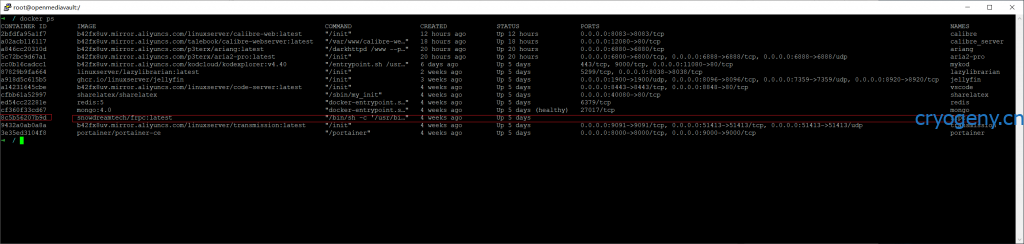
由于已经采用docker 配置过frpc,先用docker ps 查看下所有container
找到frpc对应的container id
# 进入docker 的容器内部的命令,后者某些情况下可能是 /bin/bash
docker exec -it xxxxxx /bin/sh
vi /etc/frp/frpc.ini

#增加以下字段
[books]
 type=http
 local_ip=192.168.50.145
 local_port=8083
 custom_domains=books.cryogeny.cn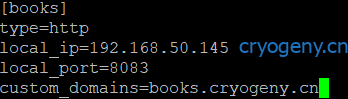
vi 模式下,按esc,输入wq,回车确认写入w和退出q
输入exit,退出container
docker restart xxxxxx
重启此container